J-Secure
The first-ever mounted diamond jewelry detector. It can detect lab-grown diamonds from a set of mounted diamonds in necklaces, bangles and rings.

Project type
A client project for DRC Techno, done while I was working at ONIO Design as a product designer. The product is launched in the market.
My role
Lead designer: HMI design, industrial design
Outcome
- 50% reduction in enclosure footprint, for more desktop-friendly usage
- 200% increase in scanning surface area
- 10% less required hardware
- Outperformed competition on throughput
| Tested under the Assure Program 1.0 | ||
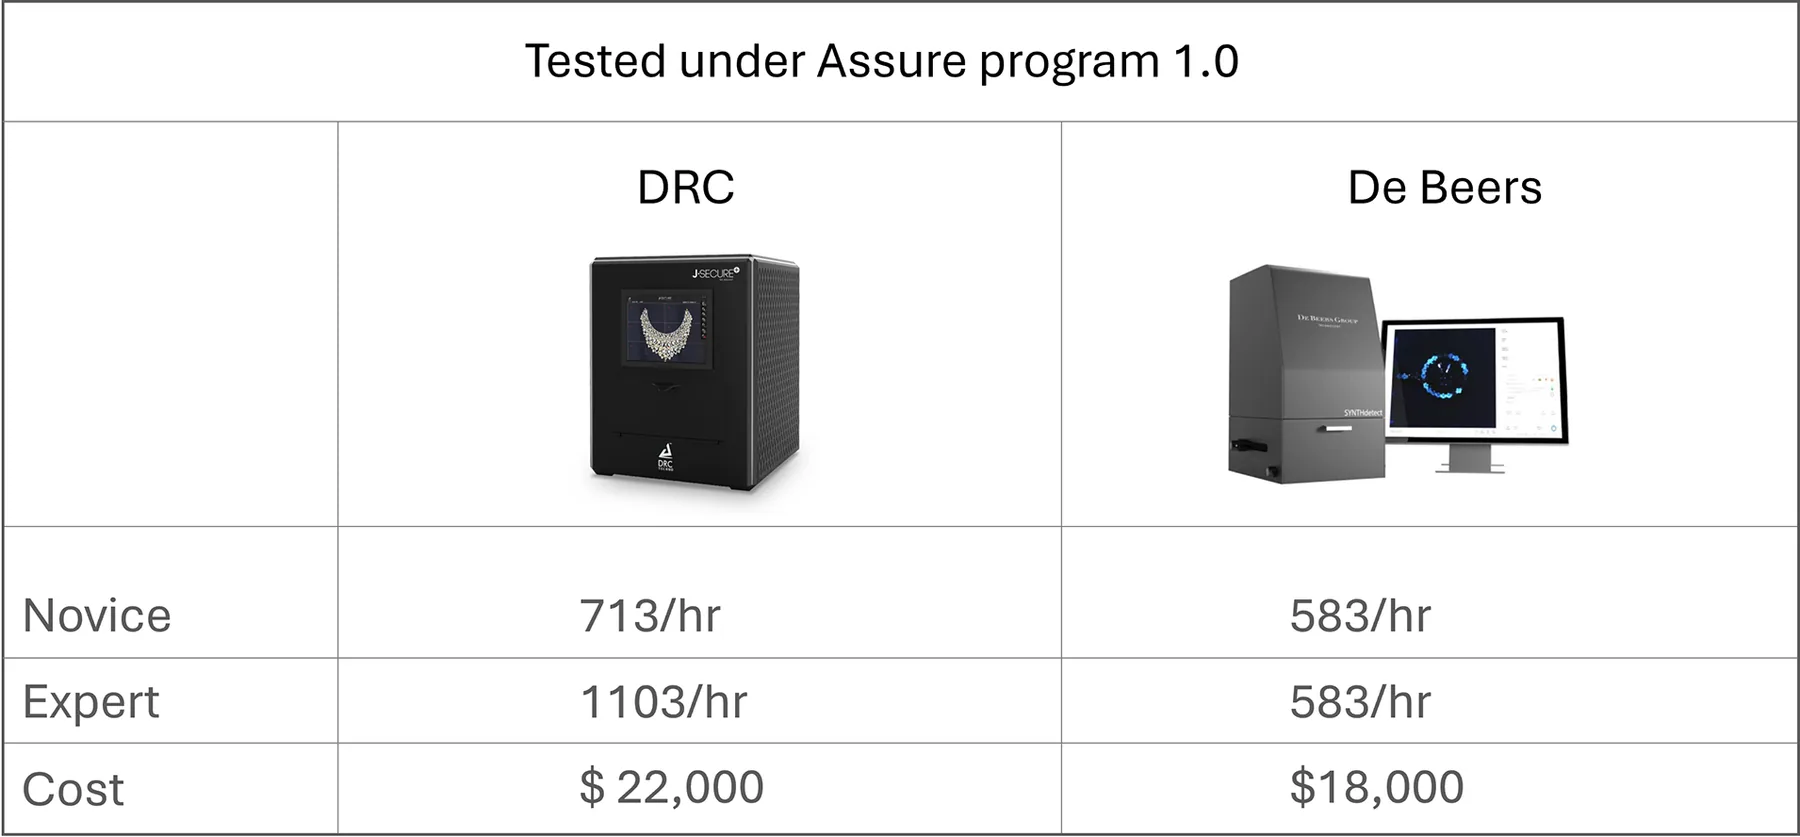 DRC J-Secure | De Beers | |
| Novice Speed | ~1103 stones/hr | ~583 stones/hr |
| Expert Speed | ~1103 stones/hr | ~583 stones/hr |
| Accuracy (core sample) | 88.0 % | 99.3 % |
| Operator involvement | Automated | Manual interpretation |
| Launch price | $22,499 | $18,500 |
Project snapshot
Distinguishing natural from lab-grown diamonds
Synthetic or lab-grown diamonds are a serious threat to the diamond and jewelry industry. They cost about 30-40% less and show up as positive on diamond tester machines, as the chemical composition is the same.
DRC Techno, a subsidiary of Dharmanand Diamonds, pioneered a scanner that detects them in all sizes and shapes. Now they were working on the first one for mounted jewelry.
Outcome and impact
- Reduced machine footprint for more desktop-friendly usage
- Doubled the throughput compared to competitors
- Optimized the physical-digital workflow
- Reduced required hardware
- Created a visual UI kit for future versions
Client-side machine prototype
Challenge and early evaluation
Rethinking the machine’s form and interface
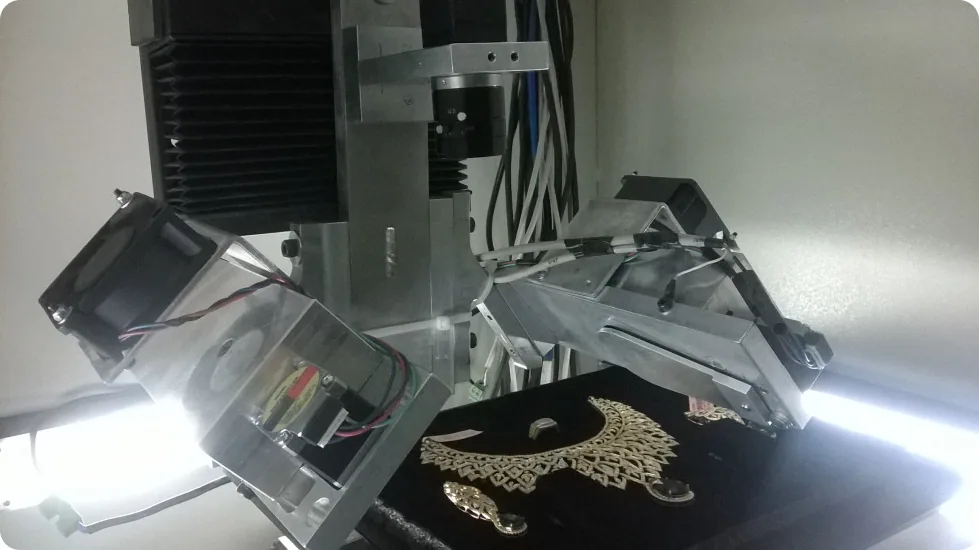
DRC approached us with a prototype: a scanning bed on two X and Y-axis linear motors with an overhead camera. The enclosure was about 3 x 3 x 3 feet, on a similar-sized pedestal with castors.
Key issues identified:
- Oversized footprint
The 3 × 3 ft scanning rig occupied too much floor space for diamond retail environments, where counter and workspace space is valuable. - Poor workspace integration
The overall form and proportions needed to be reconsidered to create a more refined product that could sit comfortably alongside other equipment on a jeweler's desk or counter.
Client-side HMI for loose diamond scanning
Client-side interface
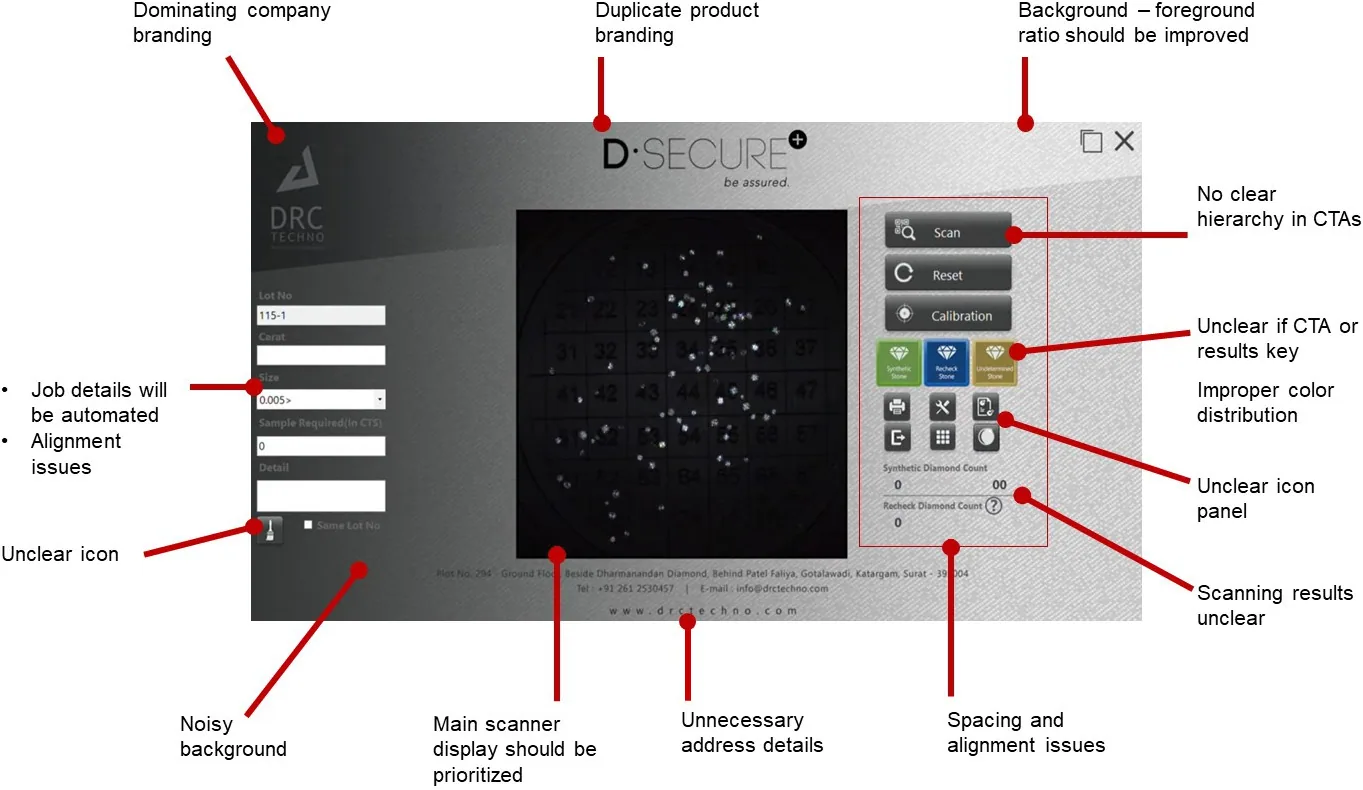
The client asked me to use the existing D-Secure interface as a starting point. However, it had originally been designed for loose diamond scanning, so it needed to be reworked for jewelery inspection. I conducted a UX audit to identify issues with the visual hierarchy, navigation, clarity of controls and presentation of scanning results.
Redesigning the mechanism
Rethinking how jewelery is scanned
Instead of moving a flat scanning bed along two axes, I proposed rotating the jewellery on a cylindrical scanning surface.
This allowed the camera to scan the entire piece along a single axis, reducing mechanical complexity while increasing the scanning area.
Just two axes were enough to cover the entire scanning area.
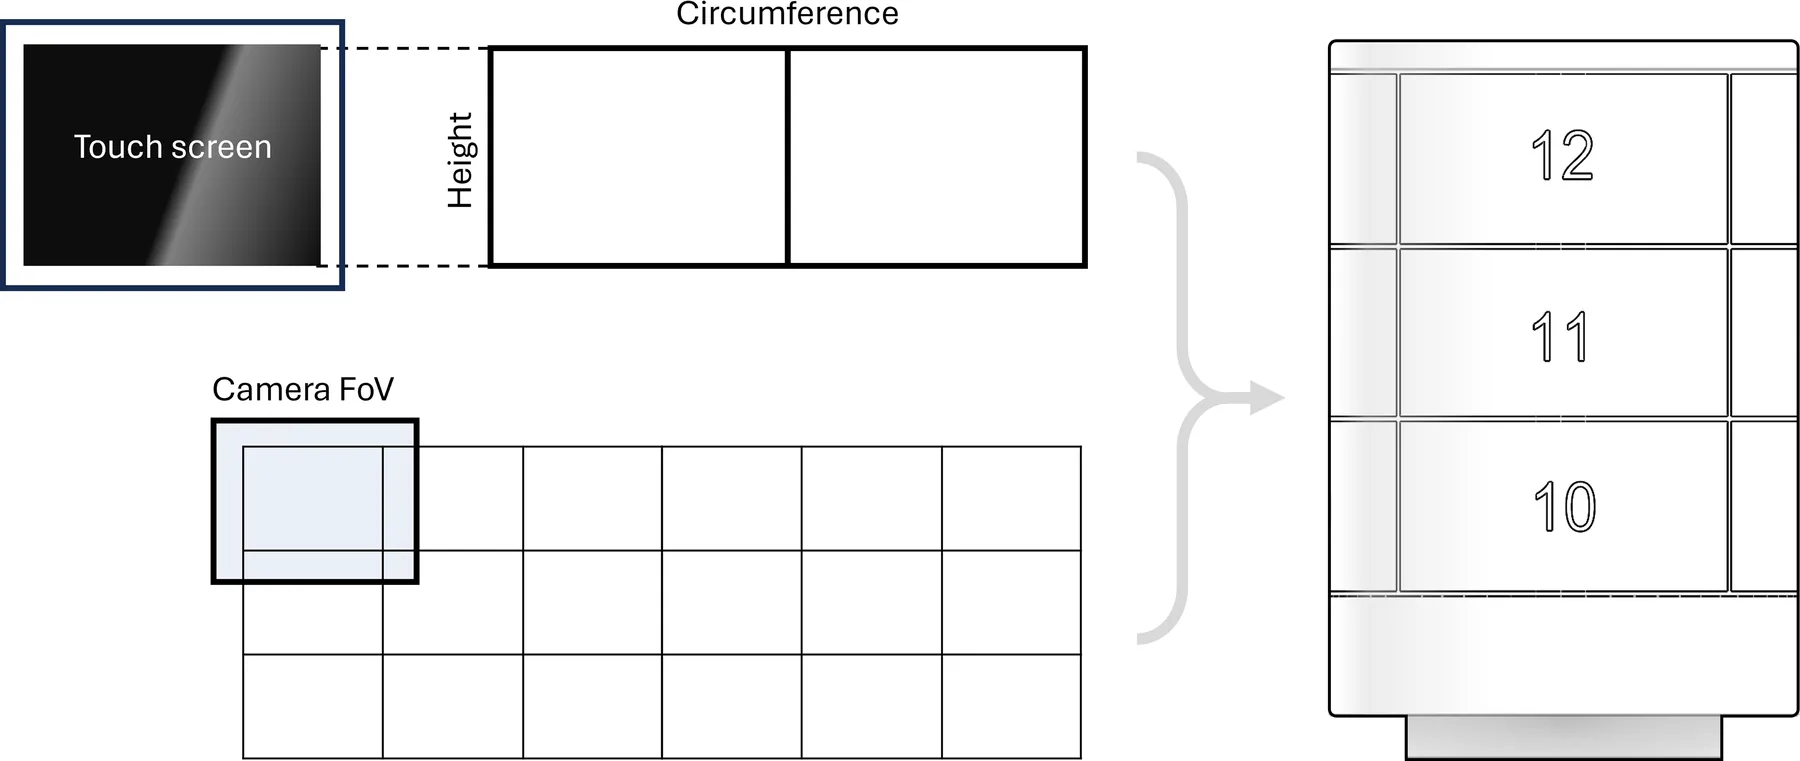
Sizing the display prop and designing the grid
The entire machine was essentially sized around the prop. Its size was a function of the touch screen's aspect ratio, to maximize screen real estate when displaying the prop on the interface.
I also designed a grid system as a function of the scanning camera's field of view.
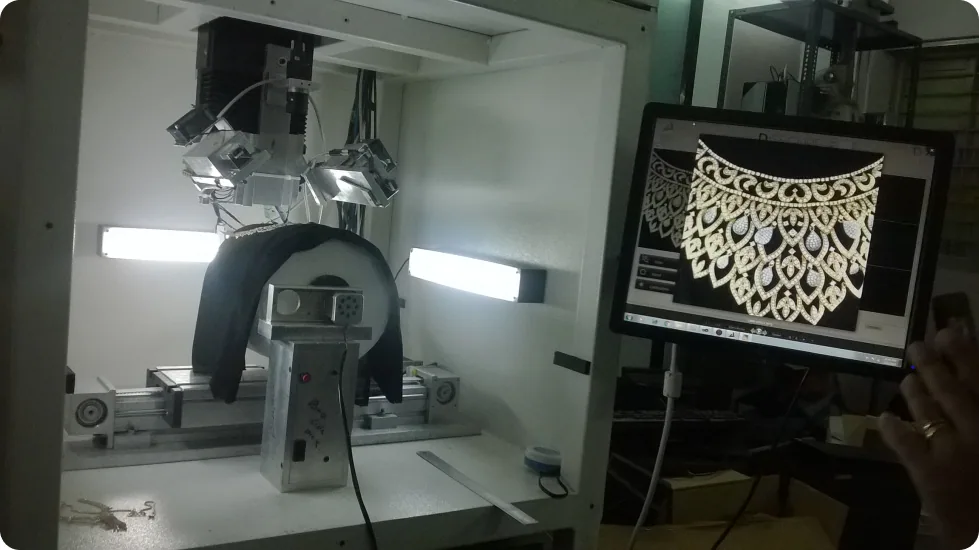
Prototyping the mechanism with engineers
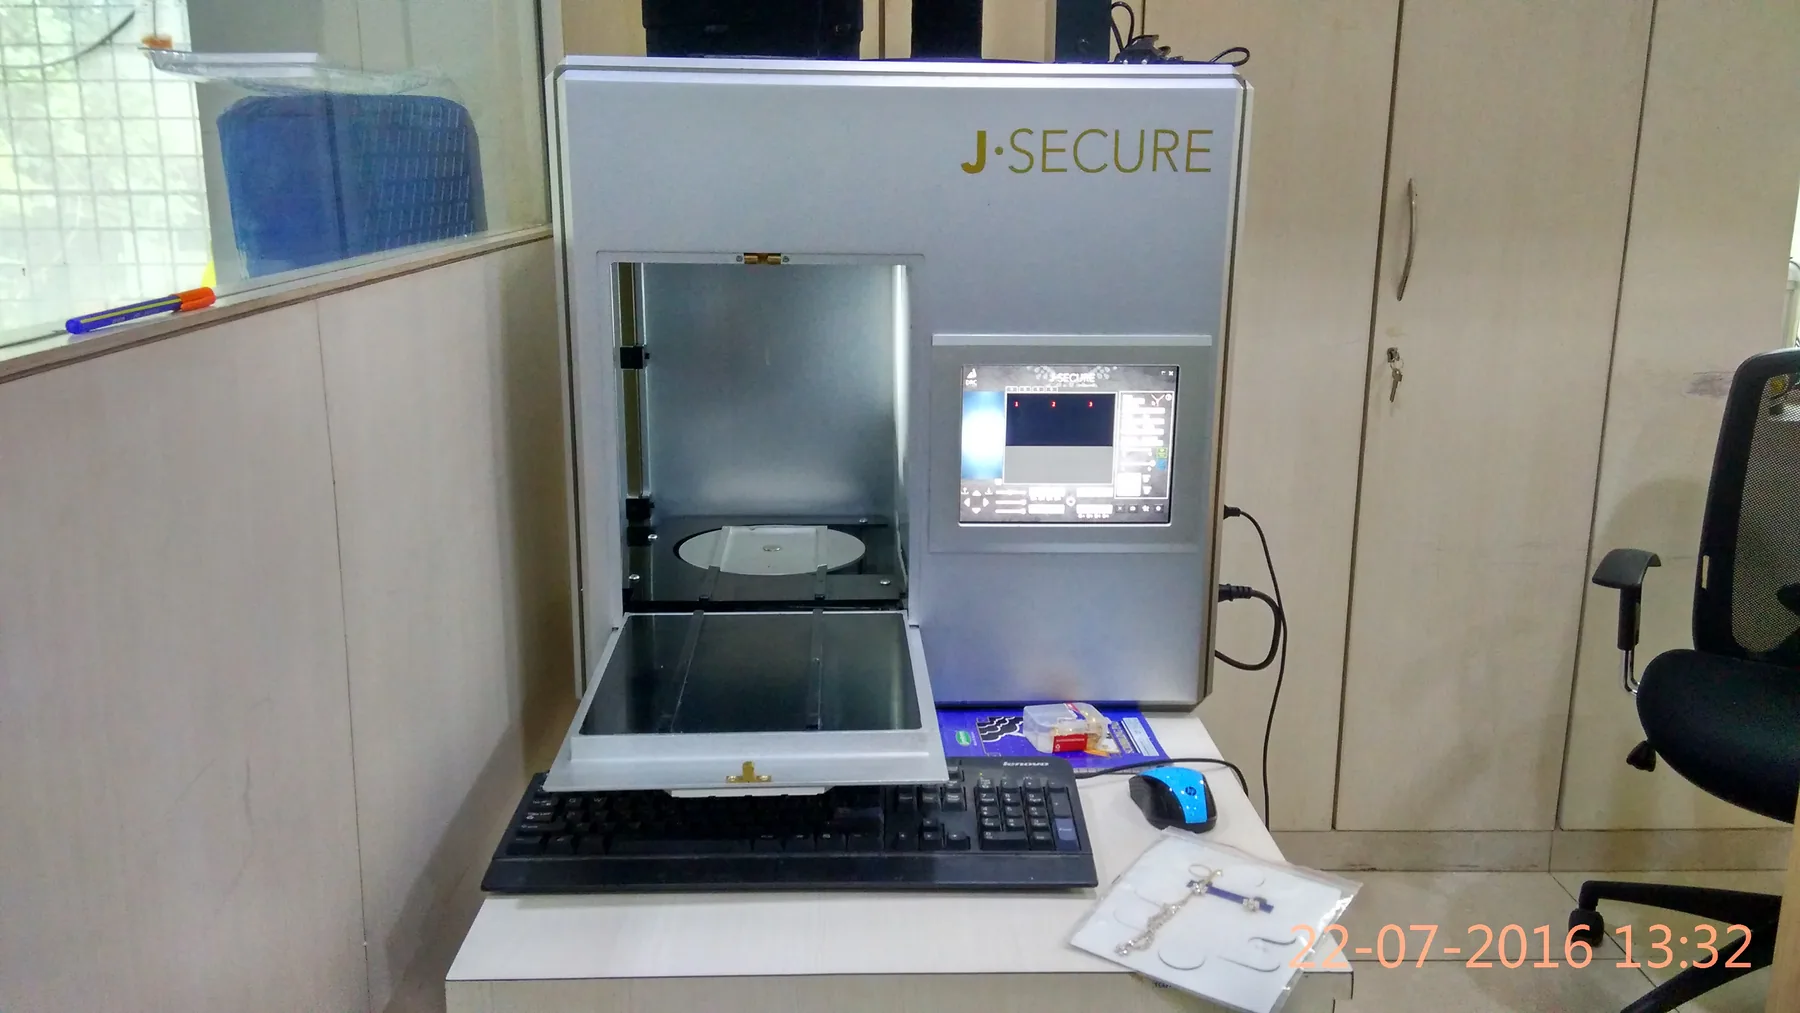
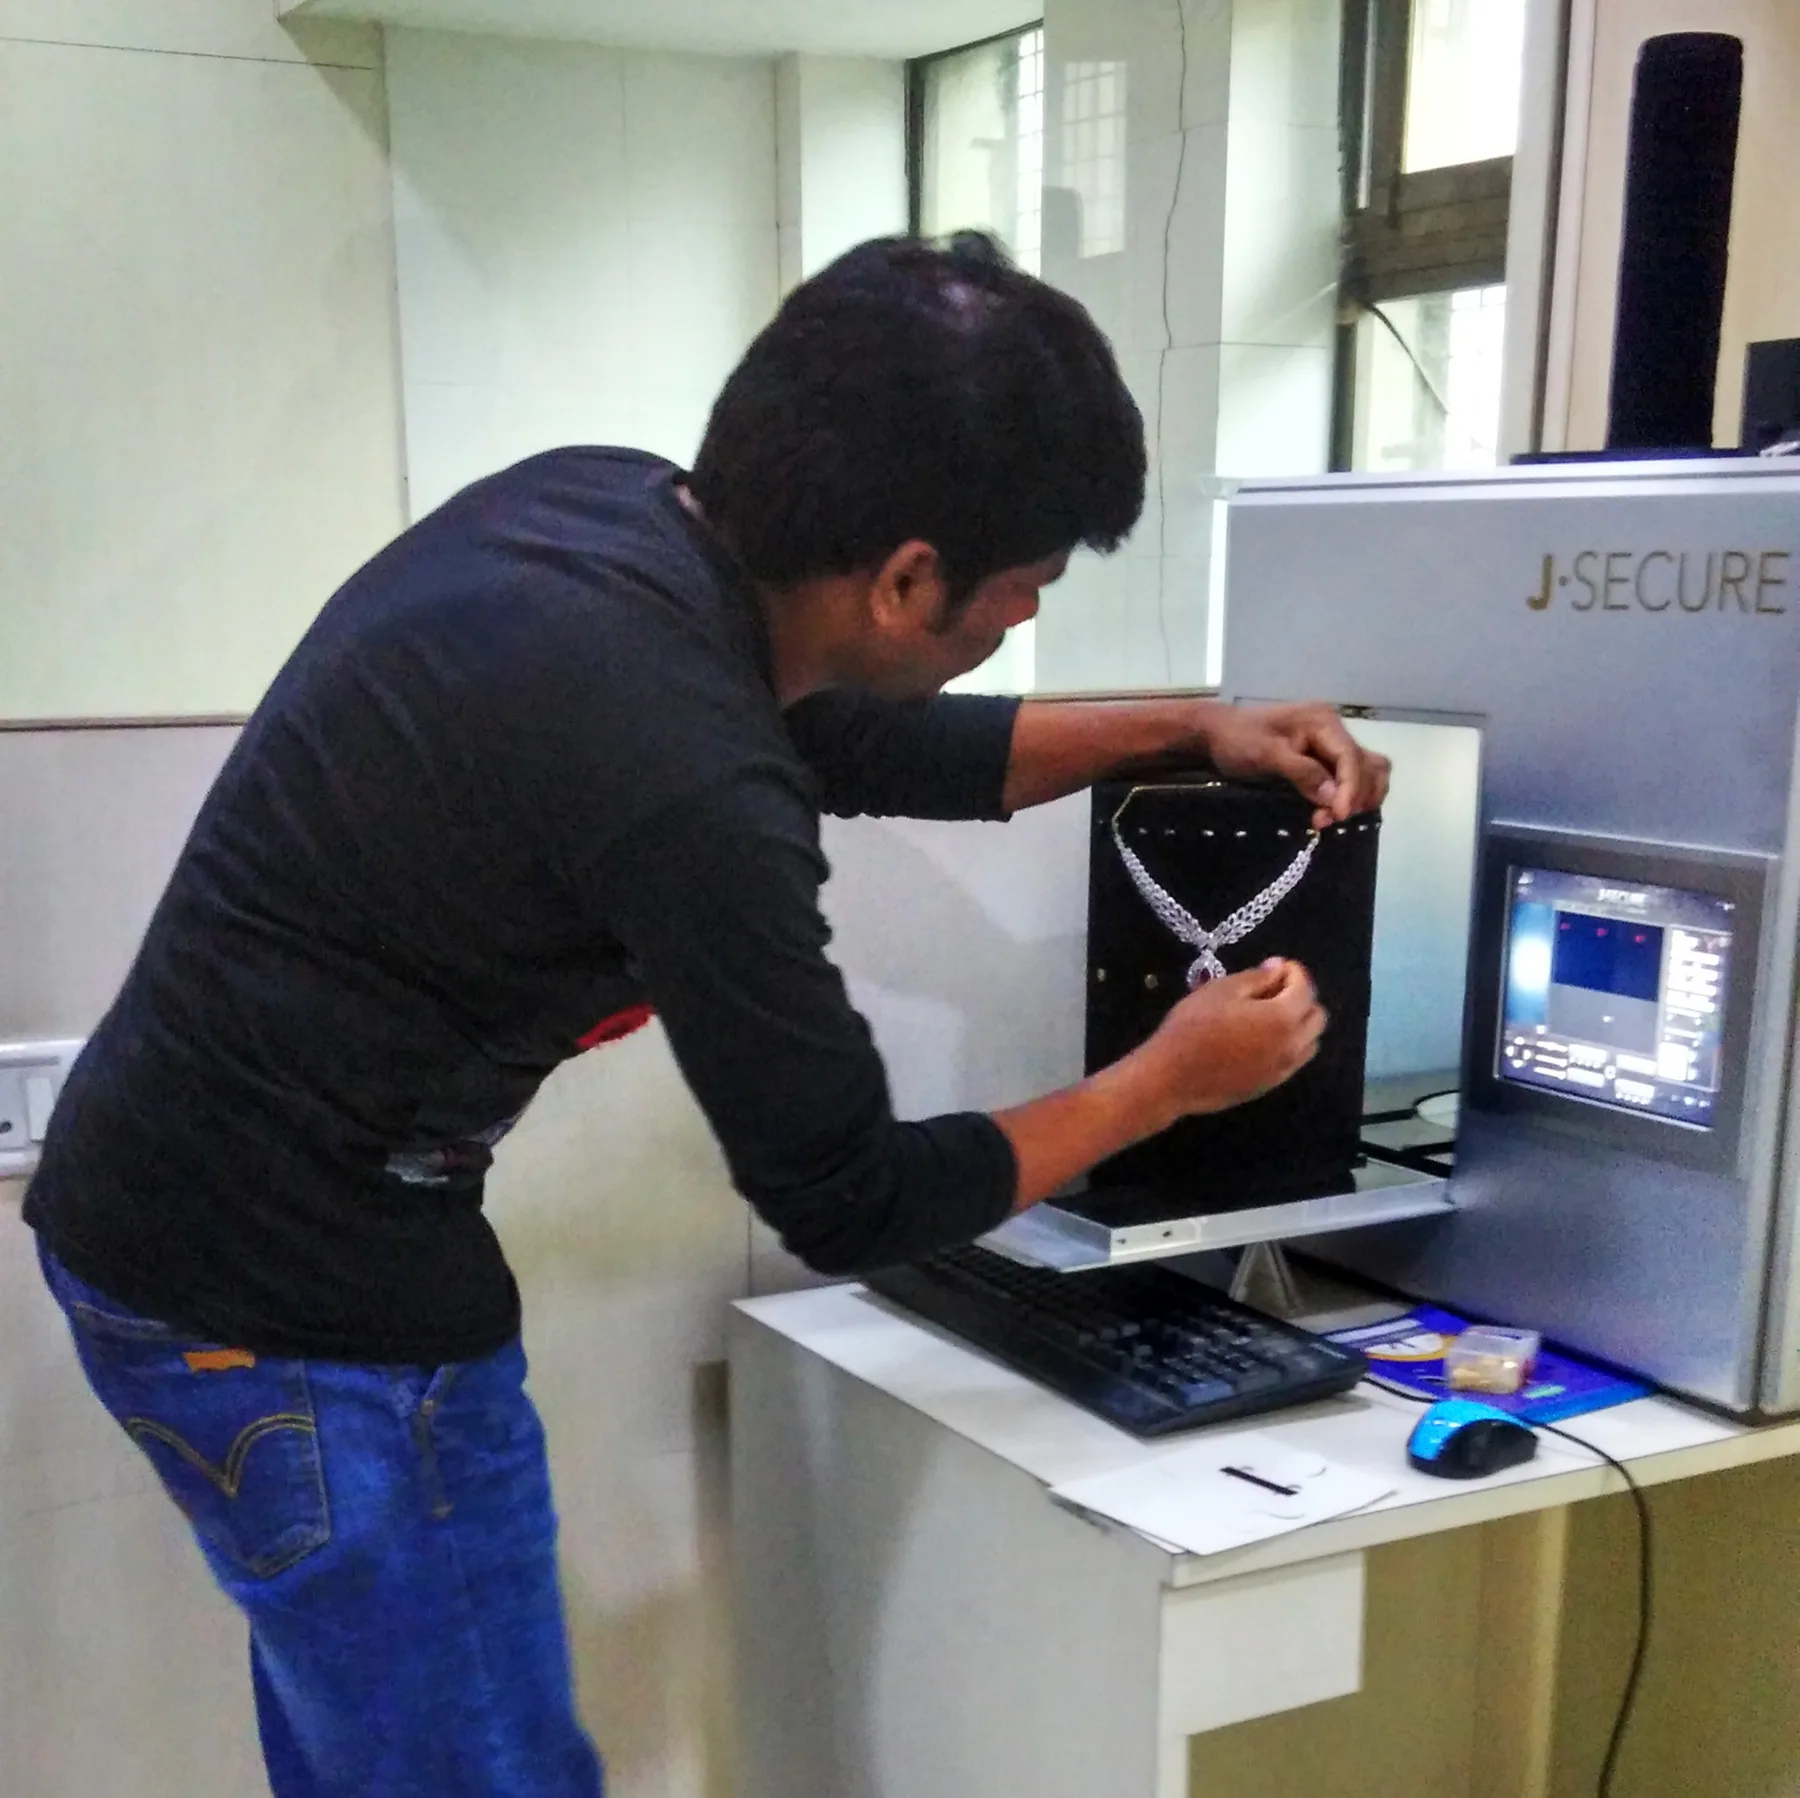
The redesigned schematic was prototyped on the client side for feasibility, and it made the machine small enough to fit on a tabletop.
The new approach changed more than the physical mechanism. It also changed how scanning data was captured and presented.
I mapped the cylindrical scanning surface onto a 12-cell grid, allowing the camera to systematically cover the jewelry while giving users a clear visual reference for individual scan areas.
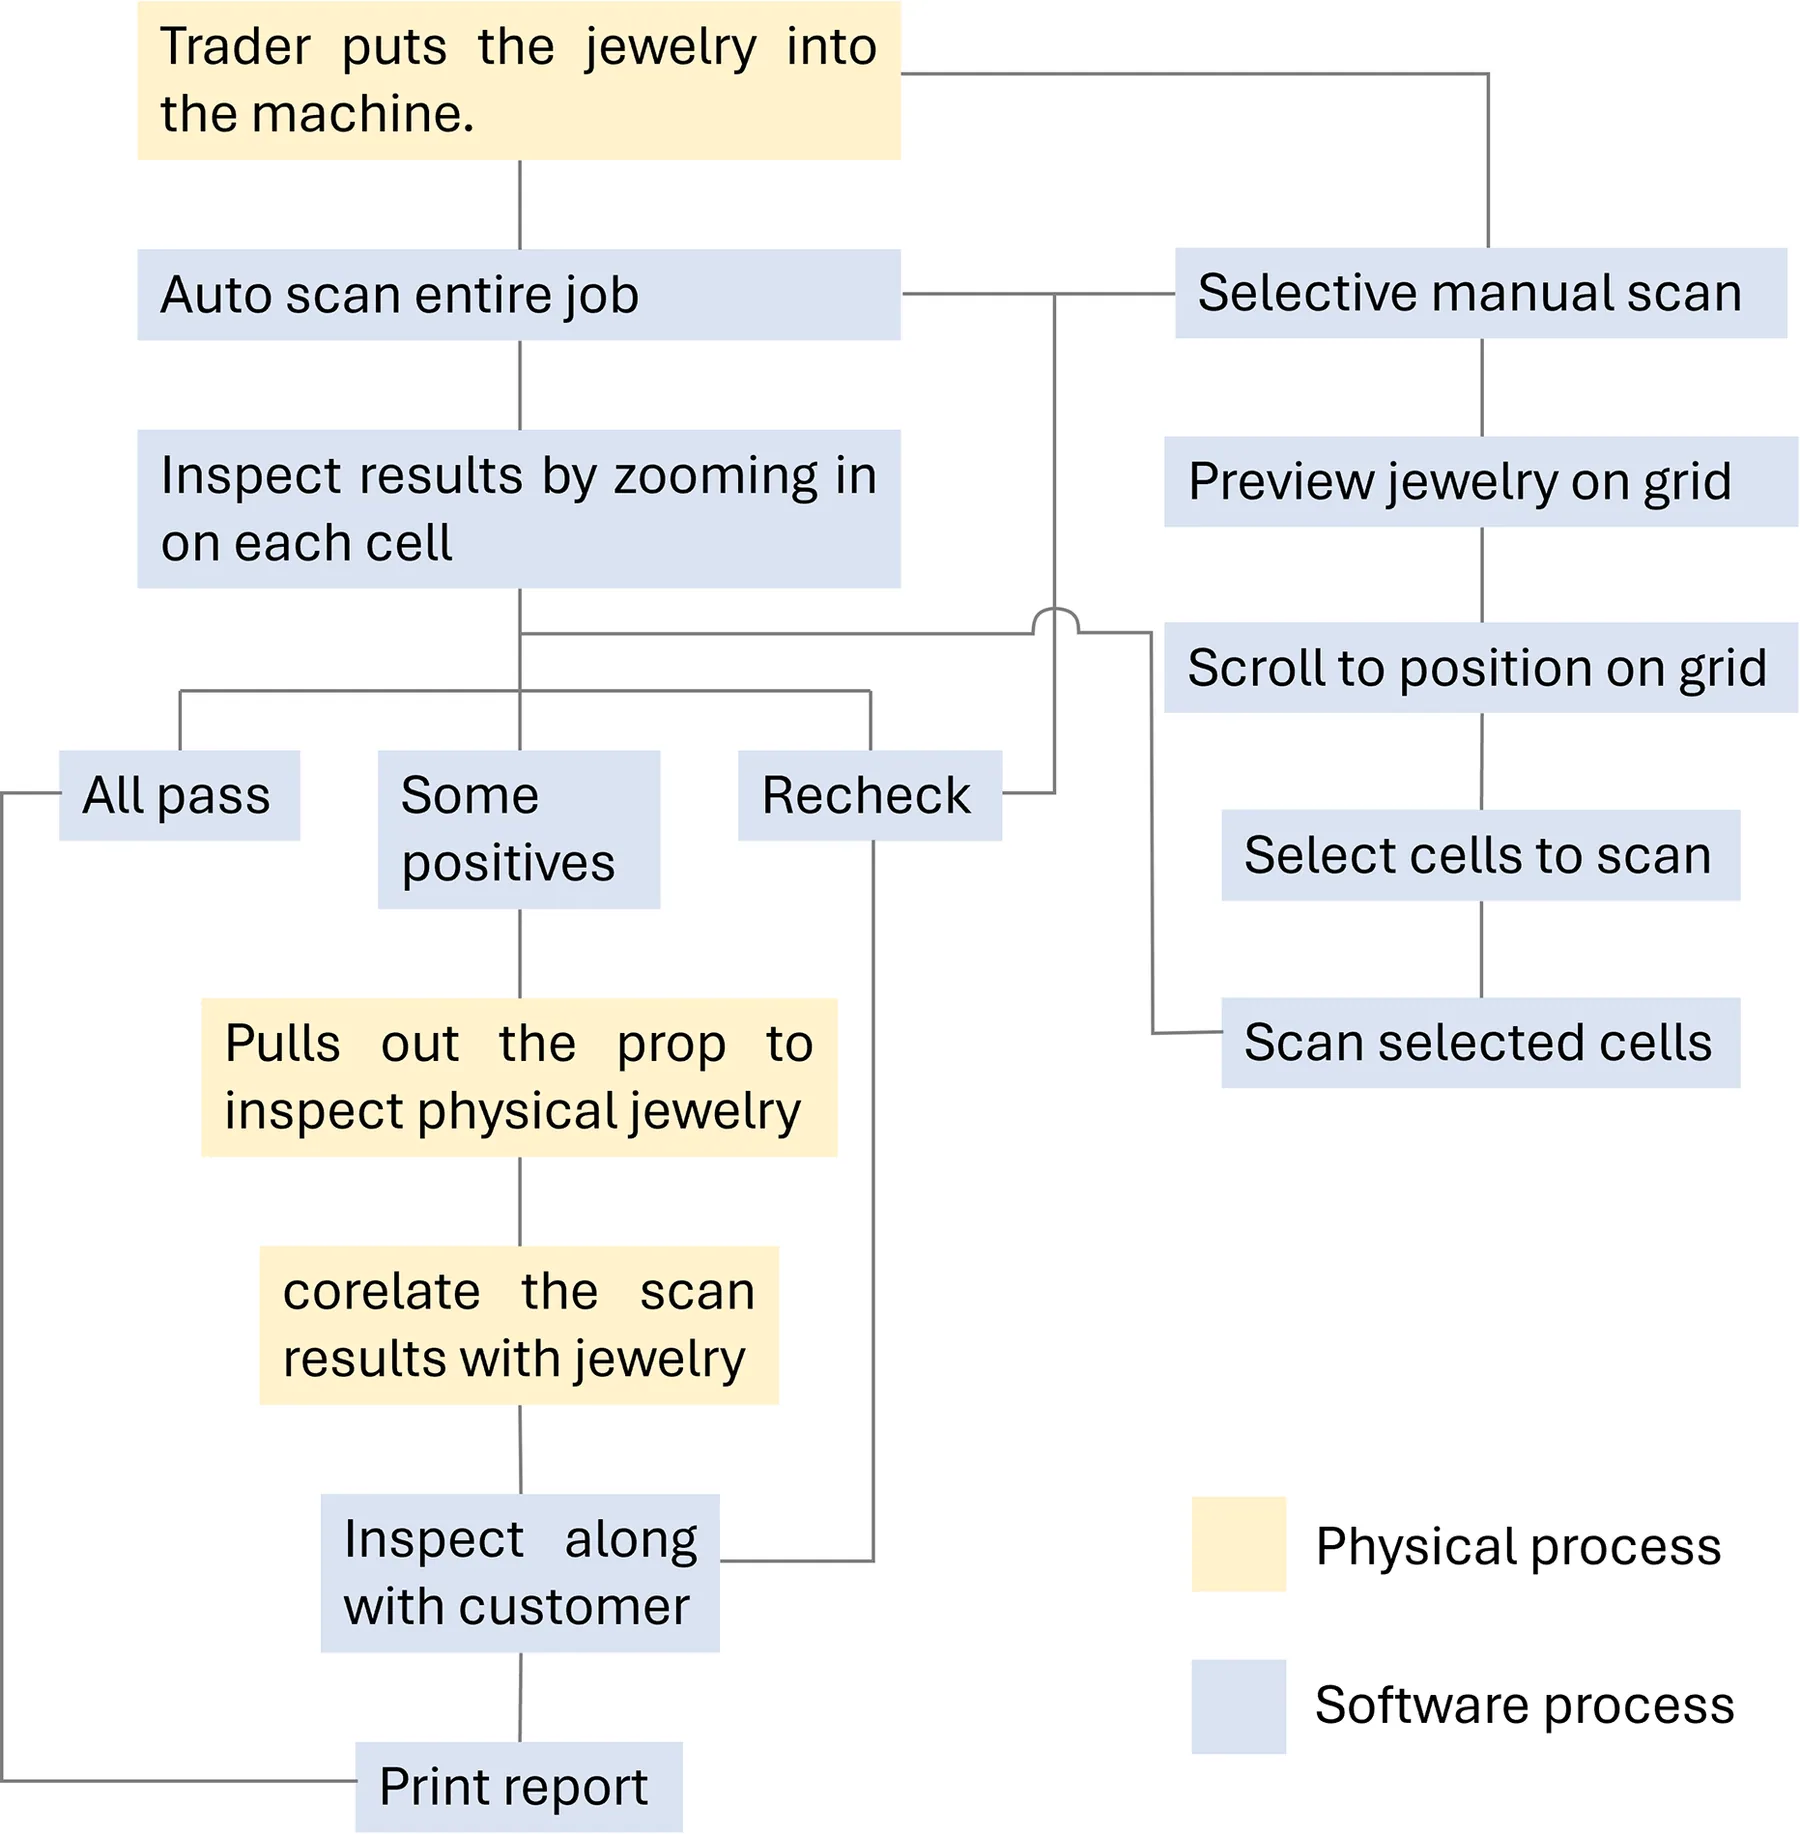
Physical and software processes
Next challenge
Redesigning the scanning software
The scanning process involved a close interplay between physical and software interactions. Users needed to move between the machine and the interface to inspect jewelery, review scan results and recheck specific areas. I mapped both processes together to understand the different paths, dependencies and decision points the interface needed to support.
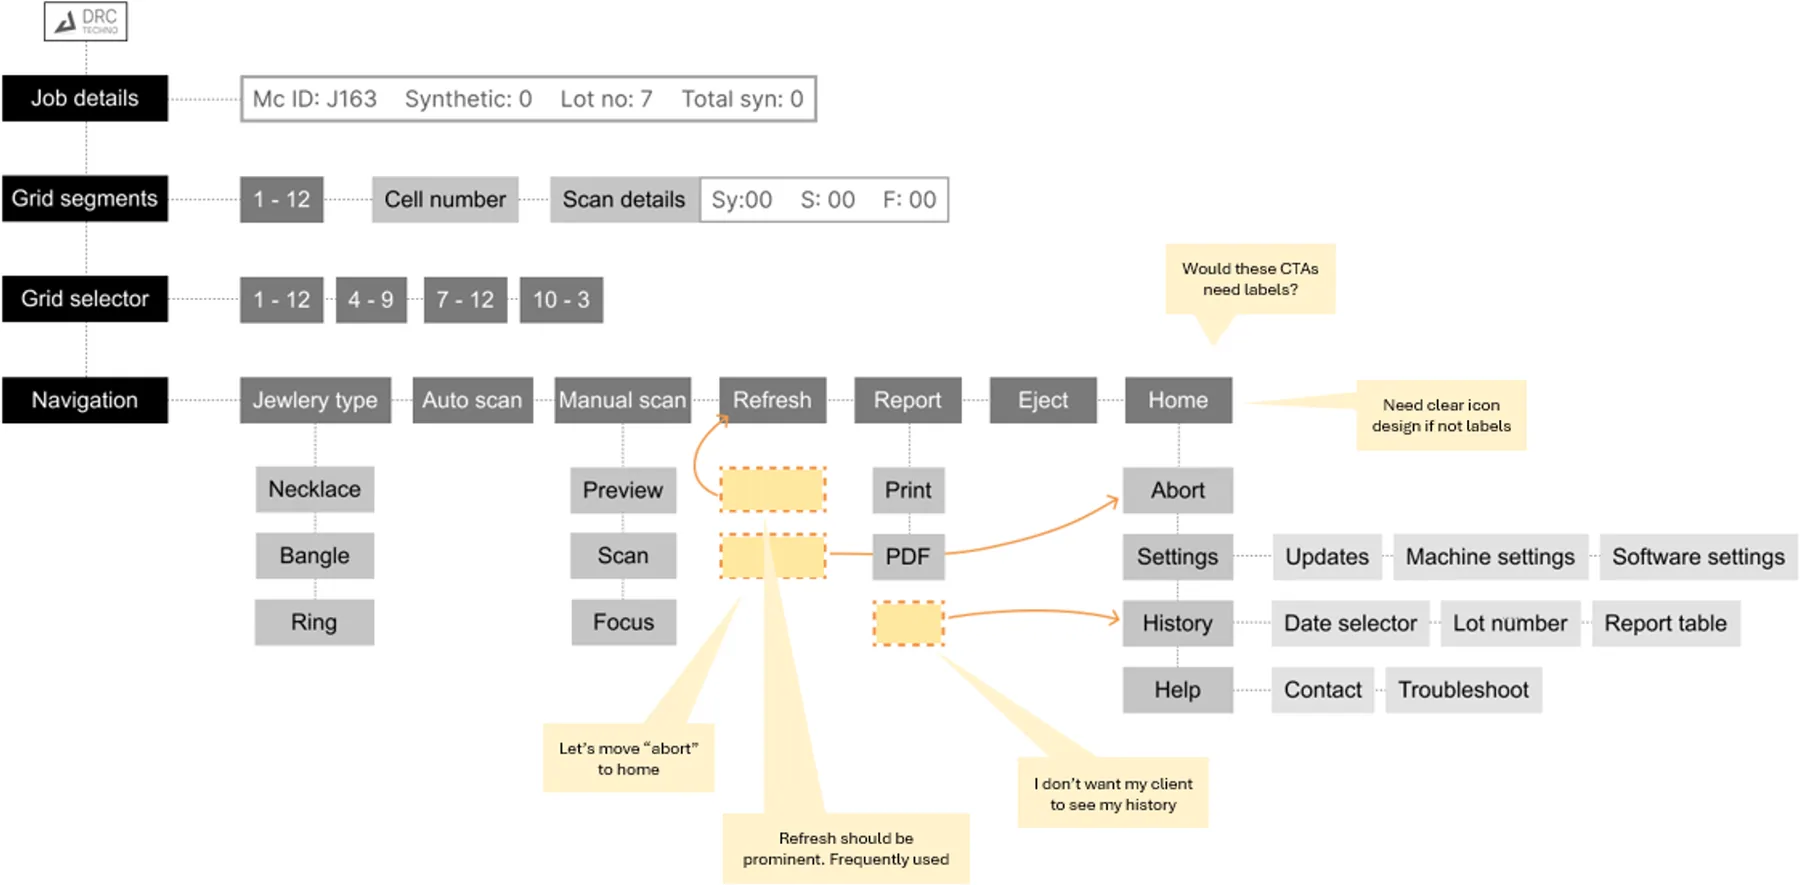
I translated these requirements into an information architecture, organising the interface around job details, grid navigation, scanning functions and utilities. The architecture prioritised frequently used actions while keeping secondary functions accessible without adding unnecessary depth to the navigation.
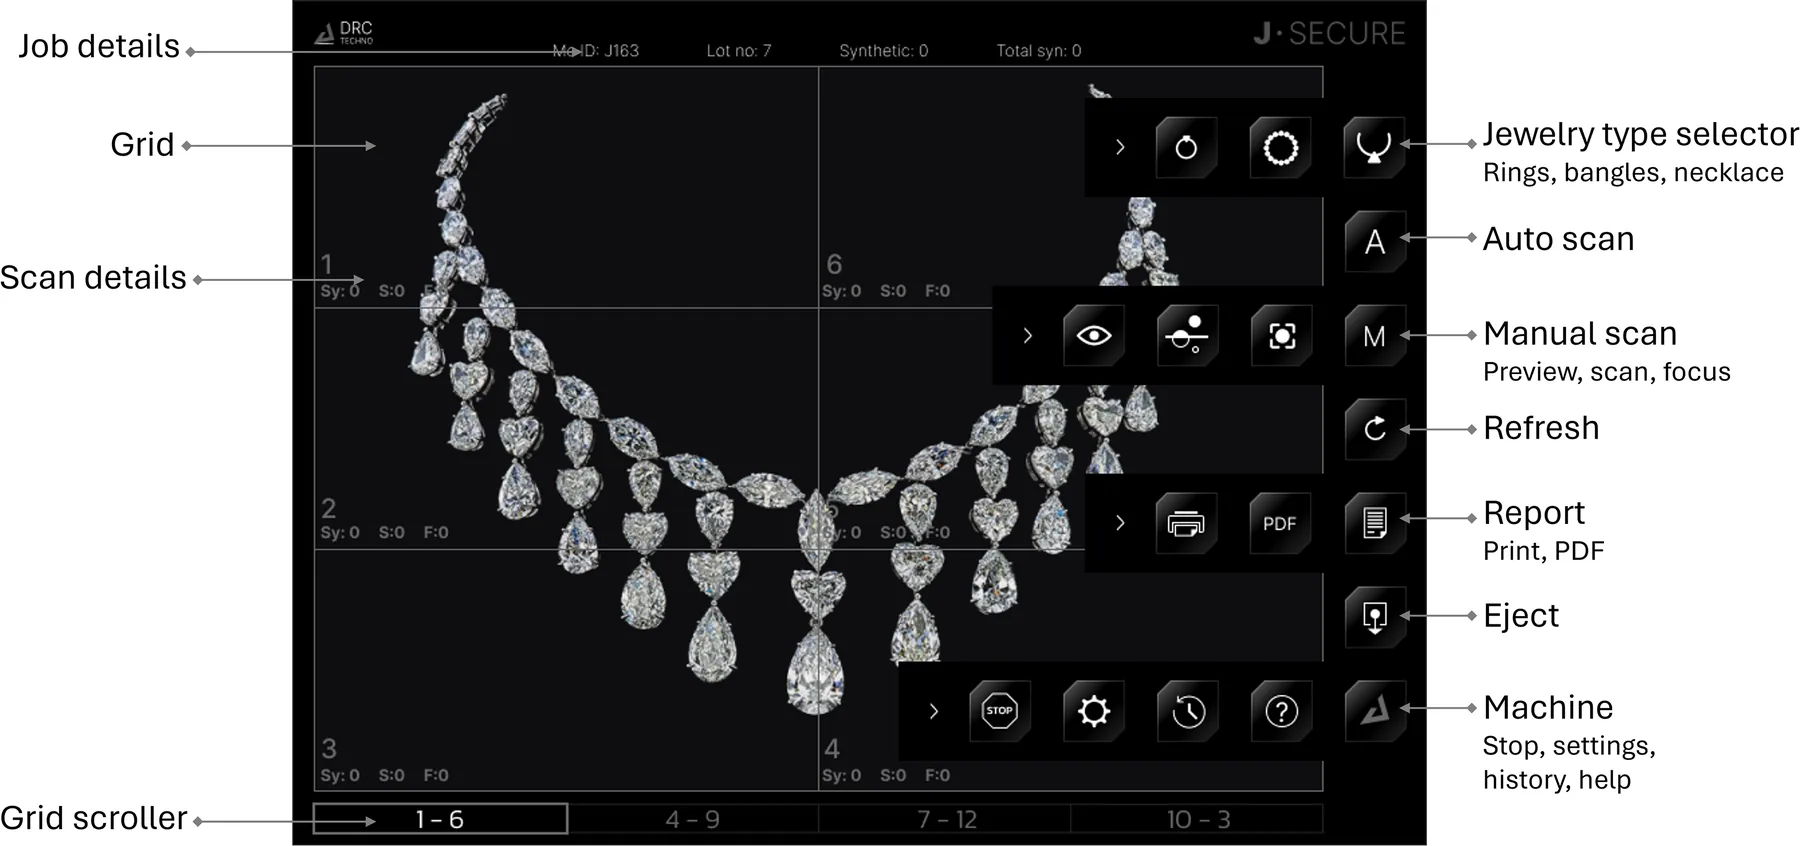
Final interface
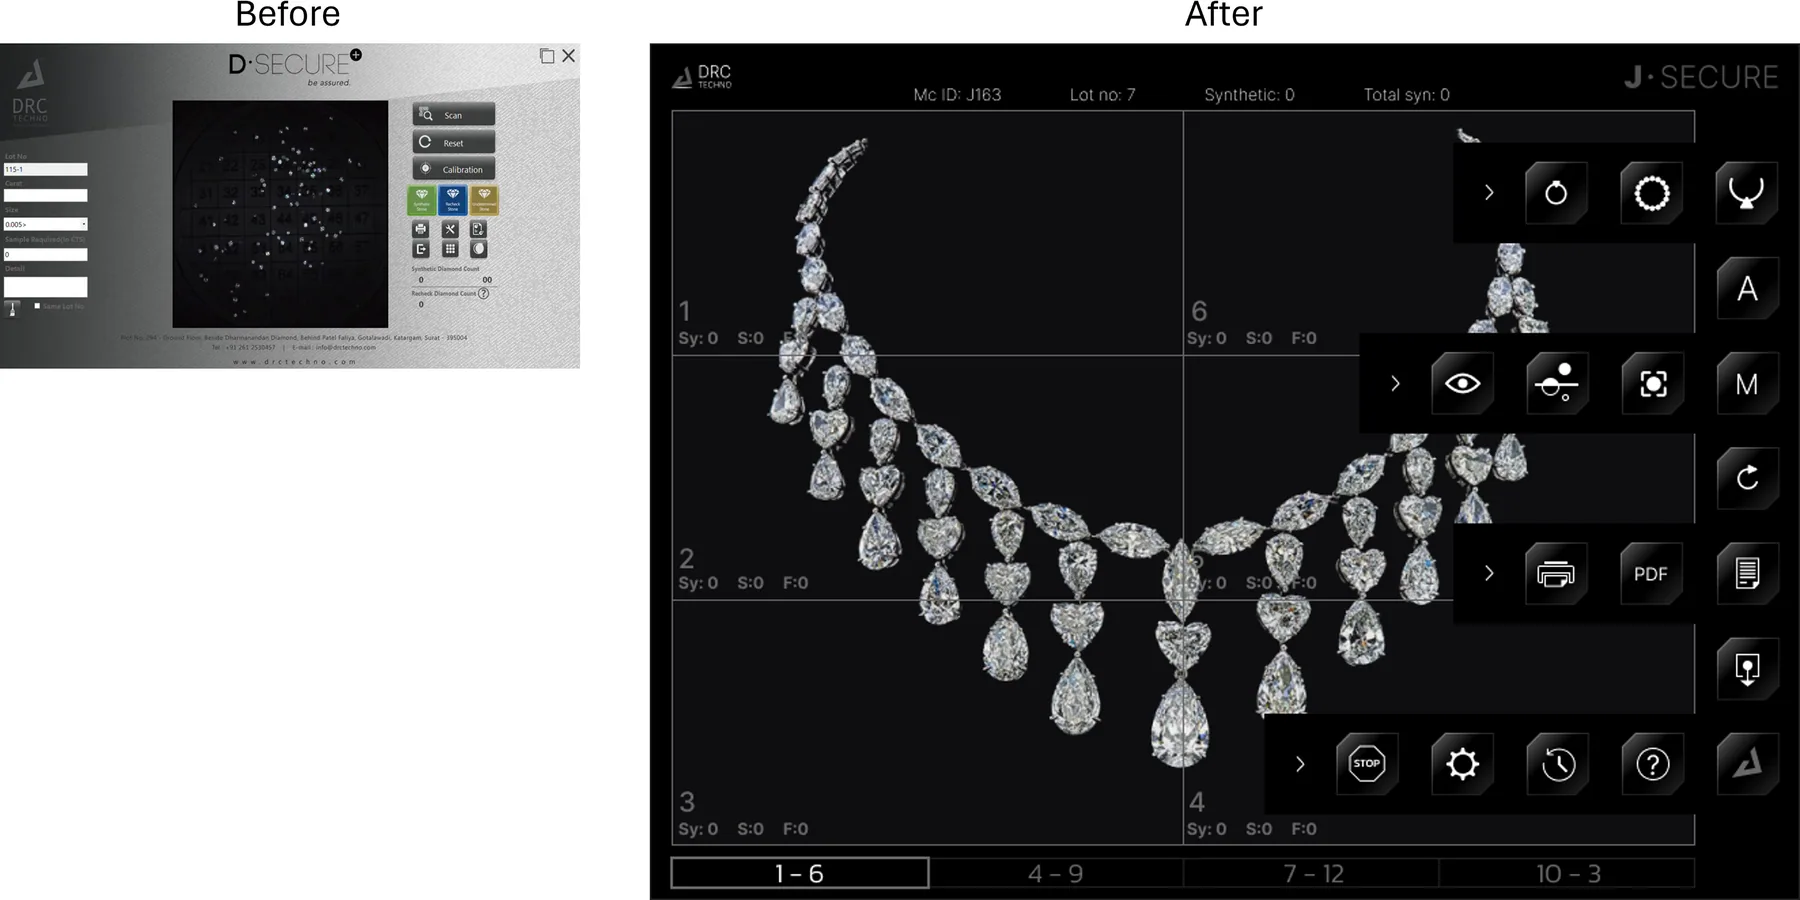
The final interface
Interface layout
- Right on top are the job details, which update automatically after each scan
- On each cell is the cell number and scan details, greyed out until you make a scan, then color-coded
- At the bottom is the grid scroll, with the CTA field aligned to the right
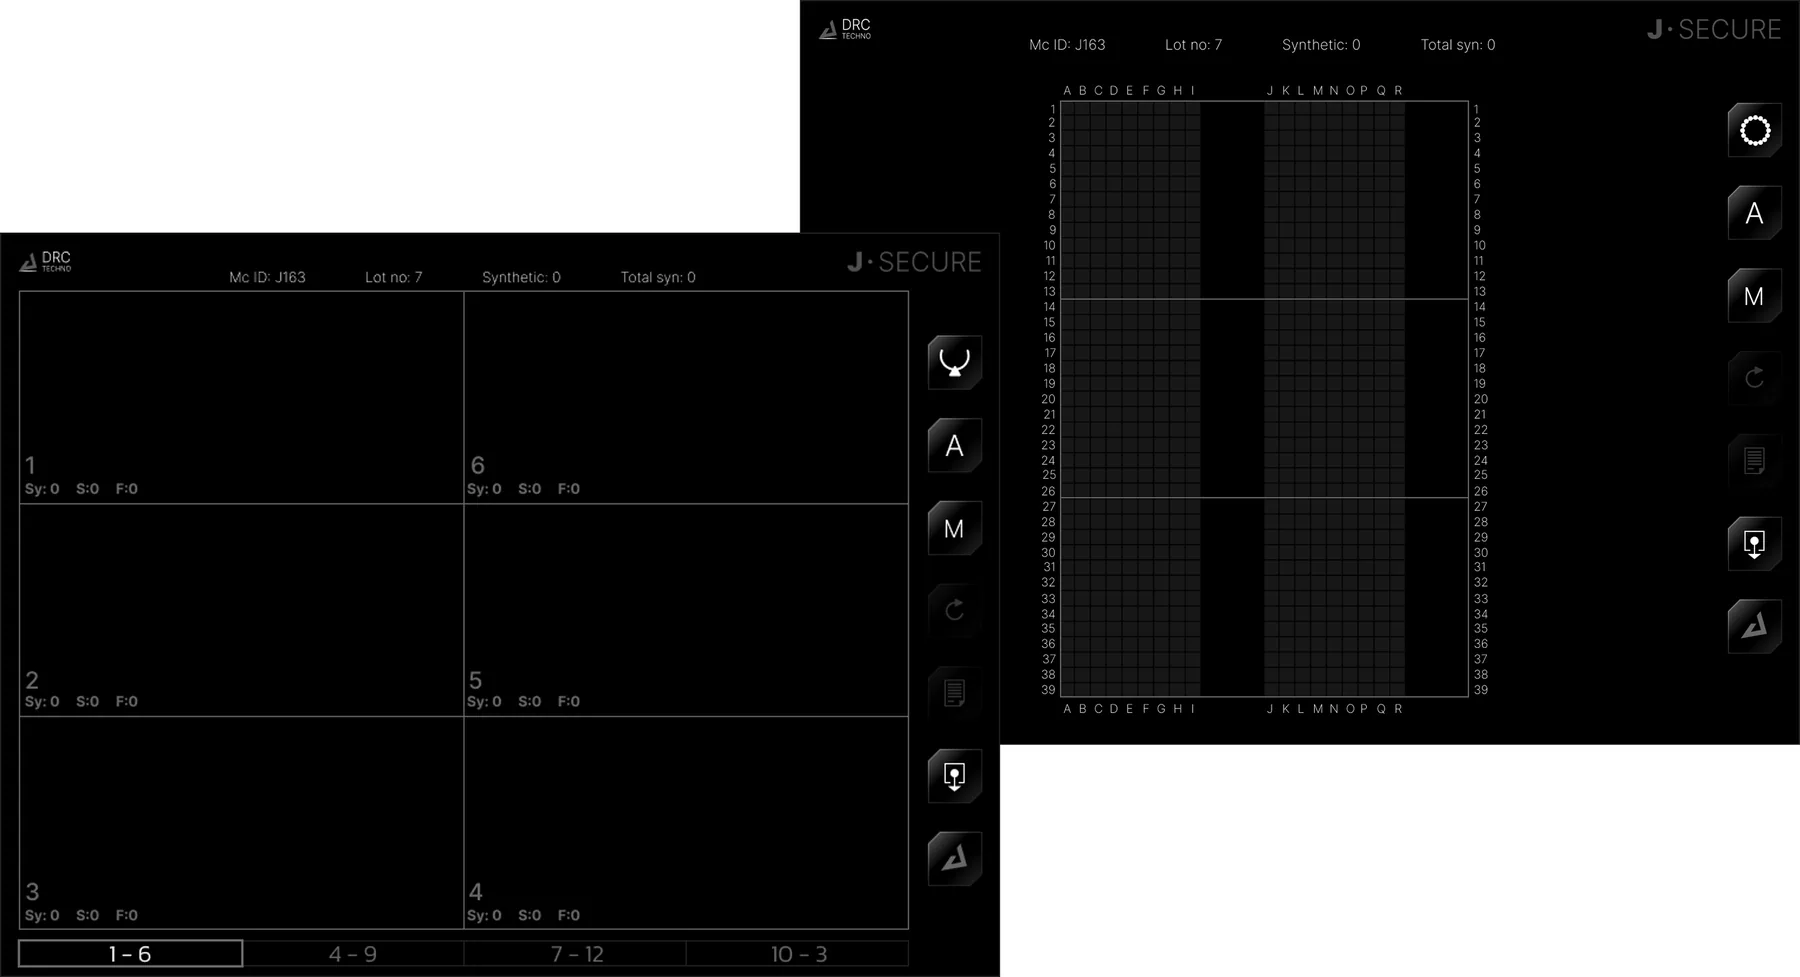
Grid layout for neckwear prop
Grid layout for bangle prop
Grid layout
Two different grids: one for larger jewelry like necklaces and chokers, and a higher resolution one for bangles and bracelets.
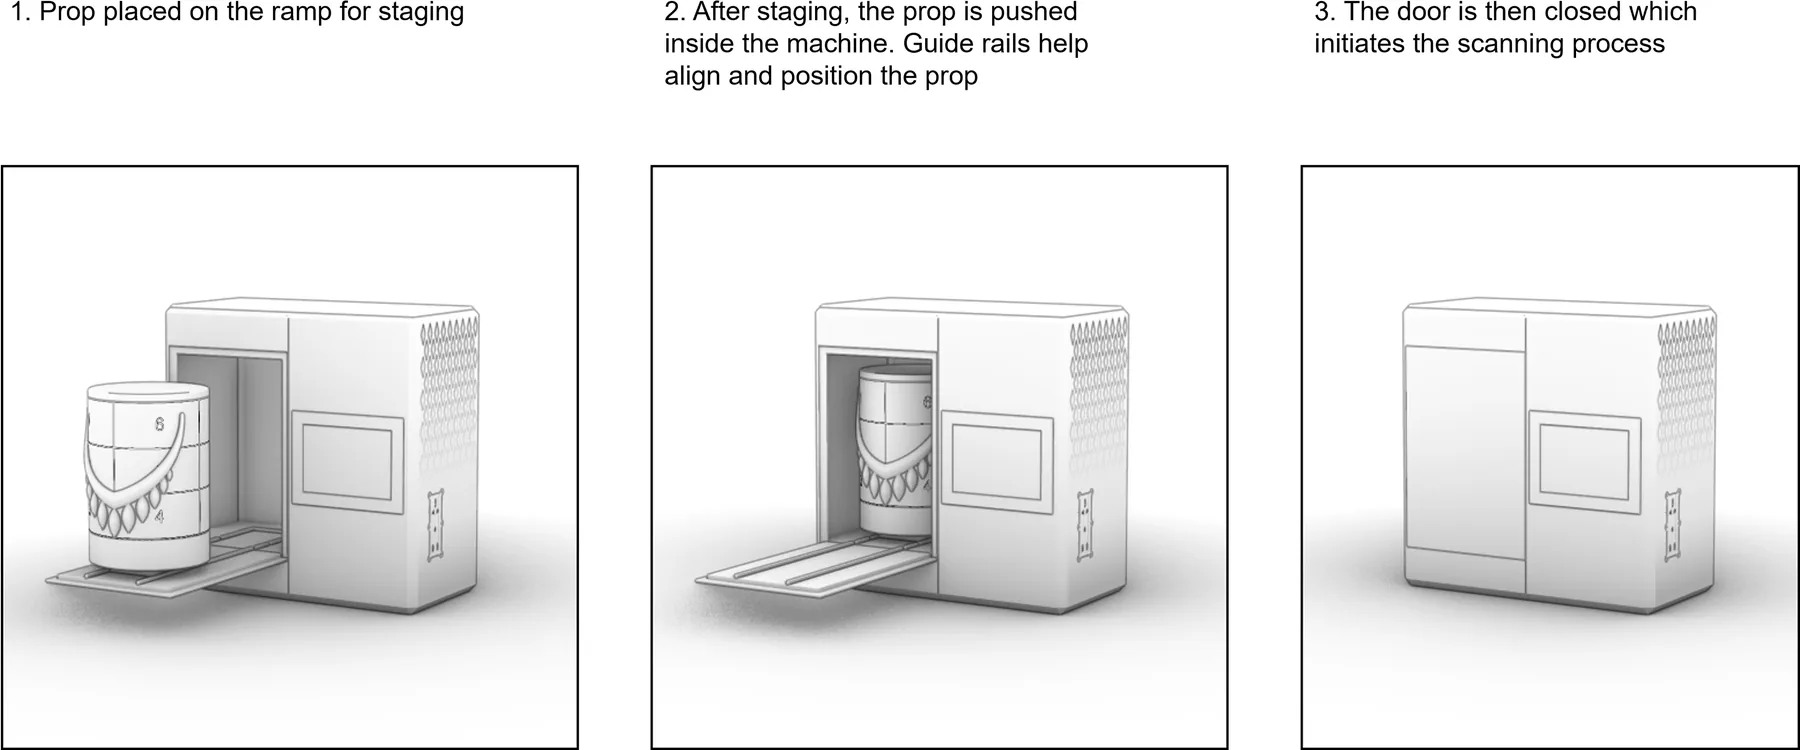
User flows
User flow: Physical
The scanning process begins with the physical interaction. The machine door doubles as a ramp, allowing users to stage the jewelry and slide it into position. Once the prop is inside, the door closes and locks to create a completely dark environment for scanning.
From this point on, the process continues over on the HMI
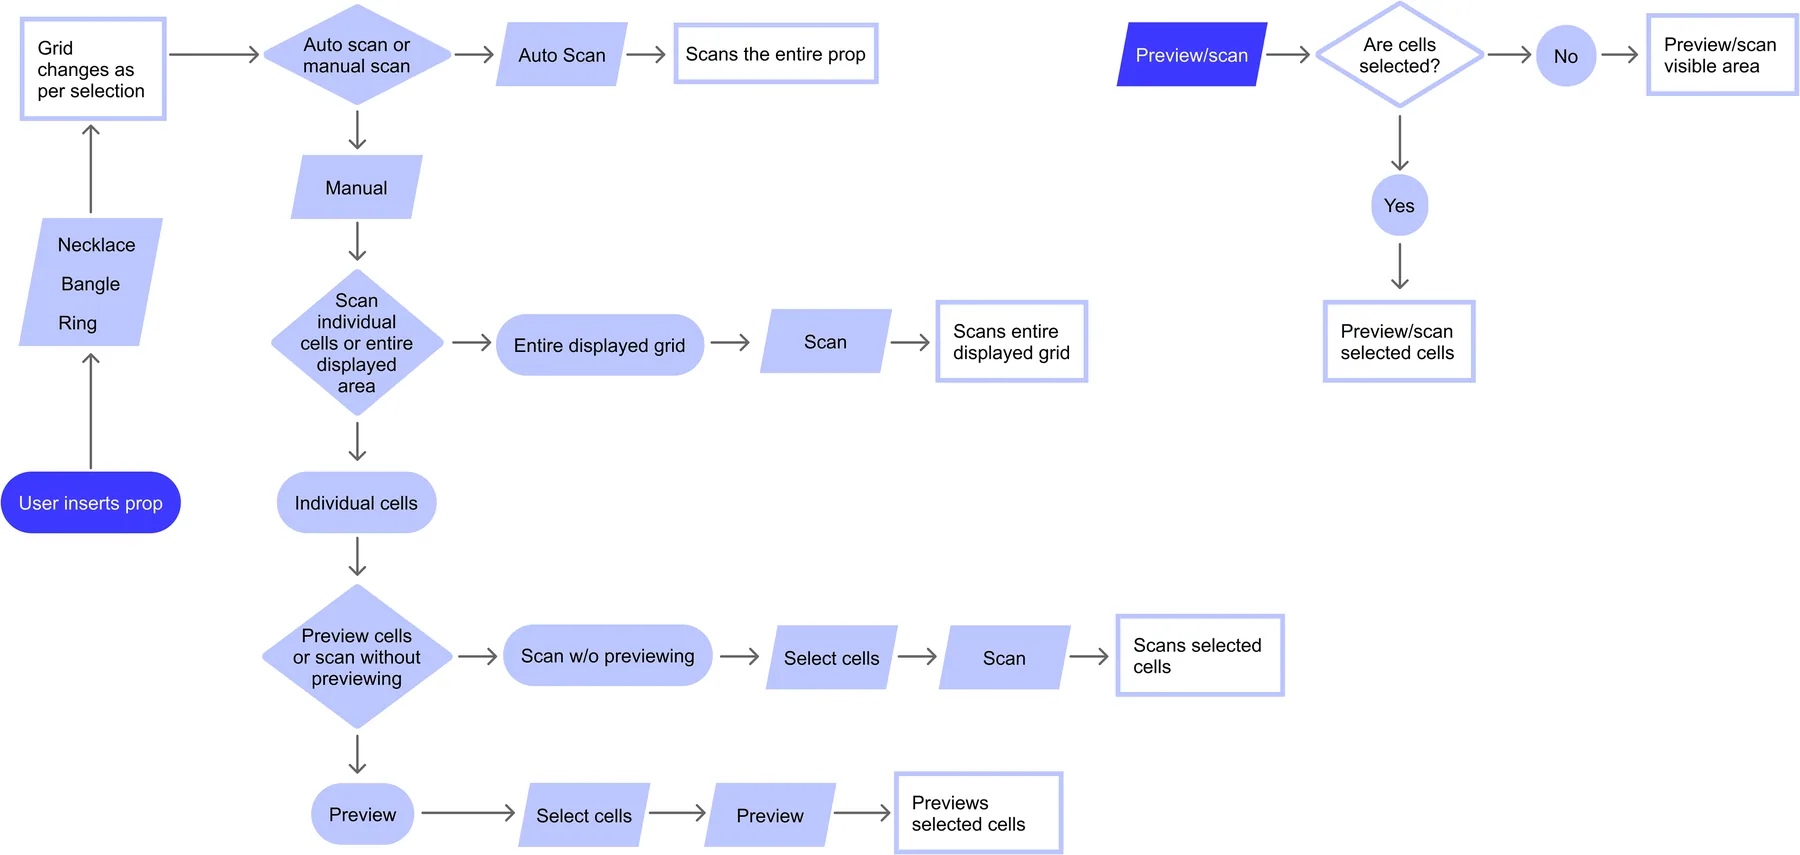
User flow: Interface
Once the door is locked and scanning begins, the HMI guides the user through the process. Users can choose between automatic and manual scanning, preview the jewelry on a grid, select specific areas to scan, and review results. The interface is designed to give users flexibility and control while keeping the scanning process clear and easy to follow.
In use
Select jewelry type to scan
The first step is to select the type of jewelry. The interface adjusts the grid accordingly to match the prop.
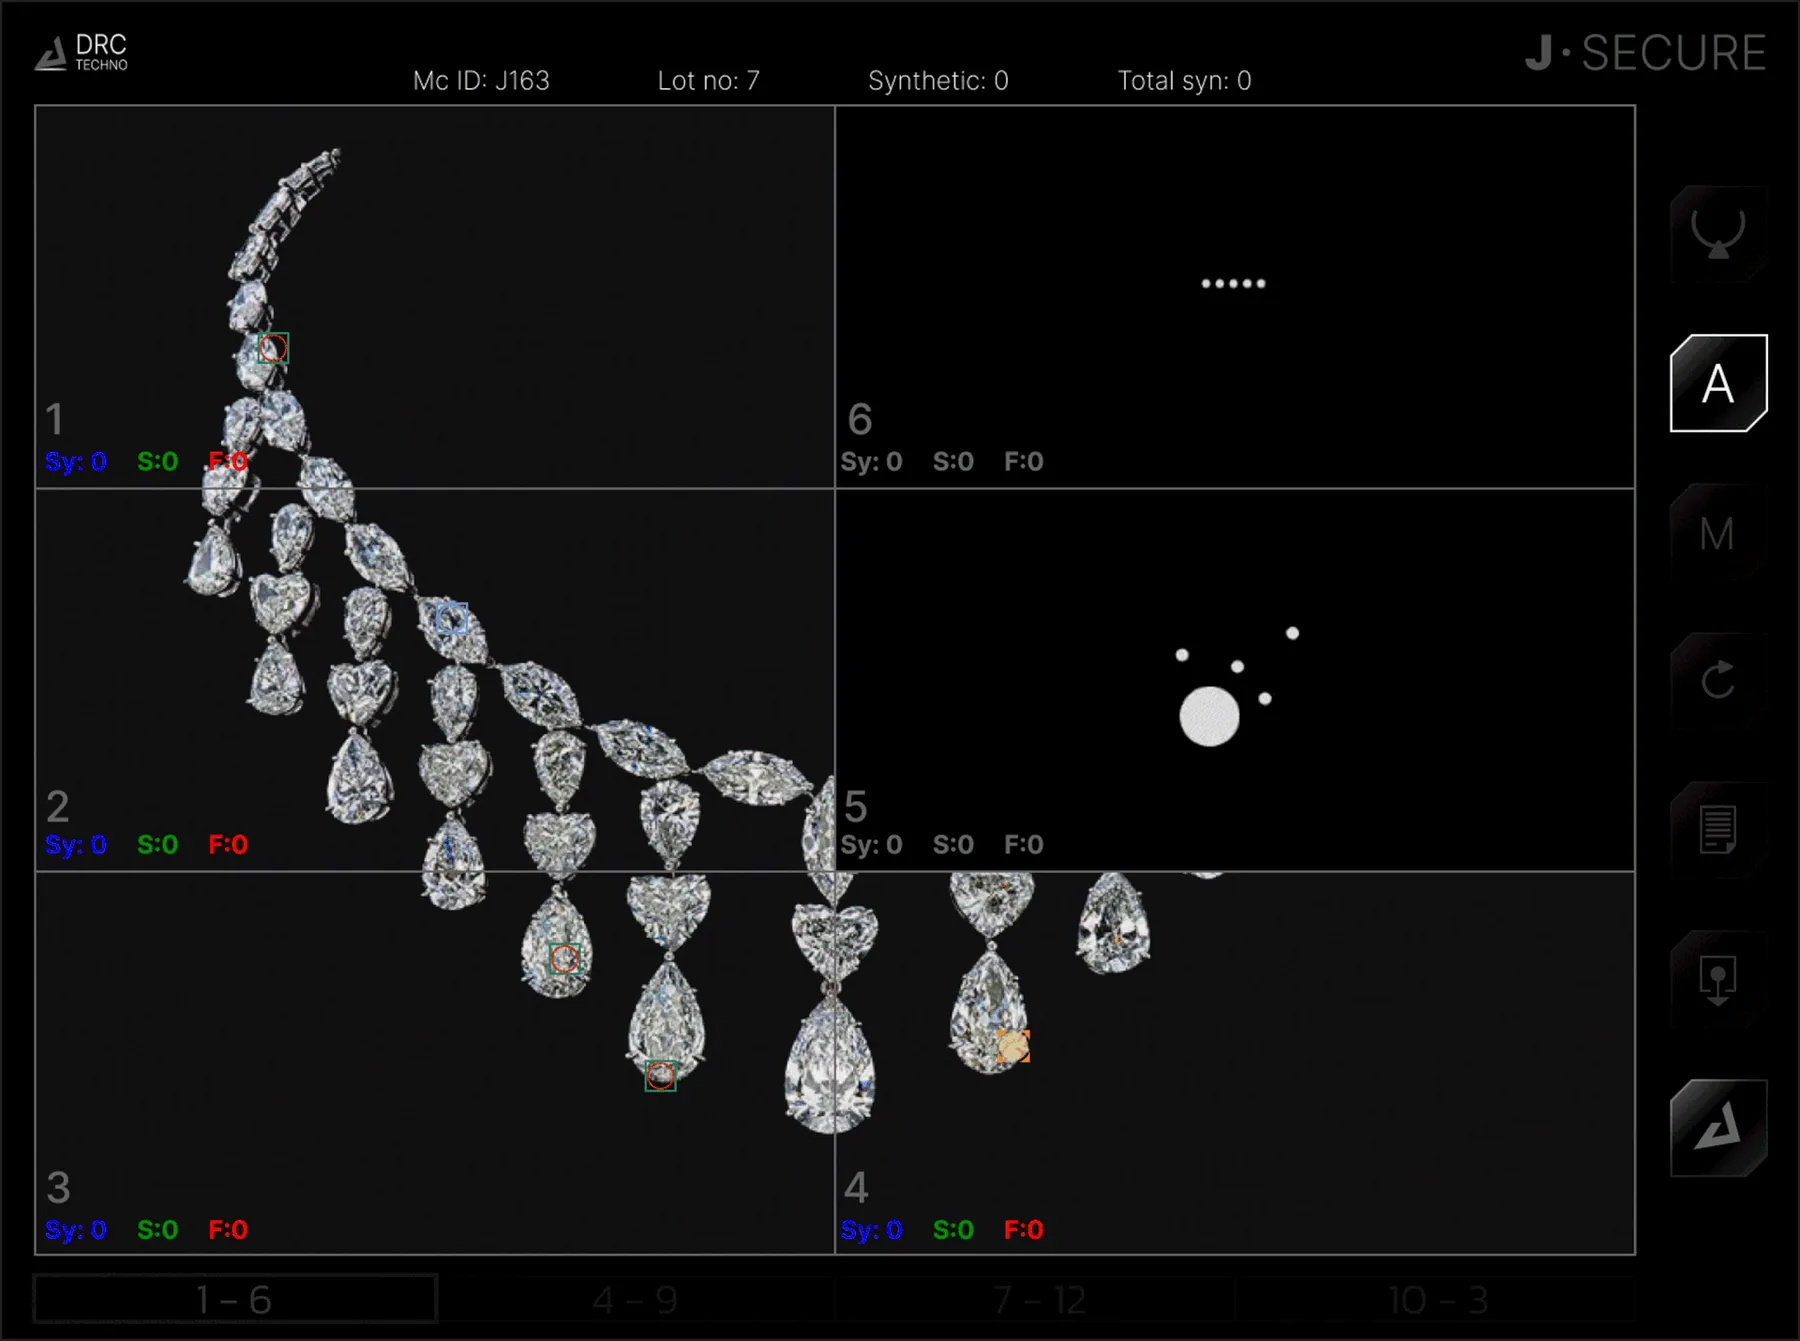
Autoscan
Autoscan to scan the entire prop at once.
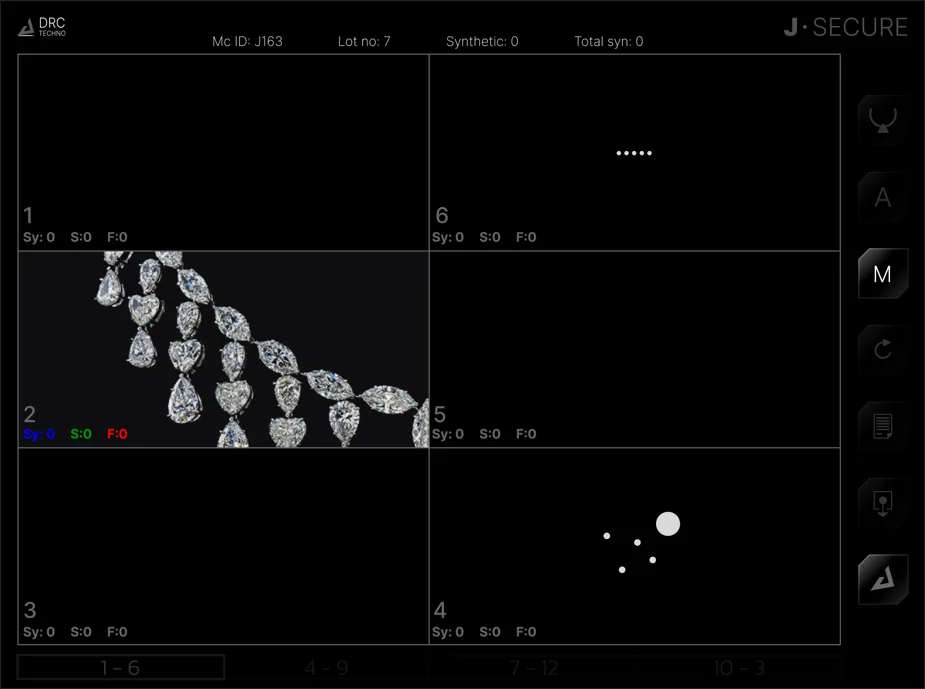
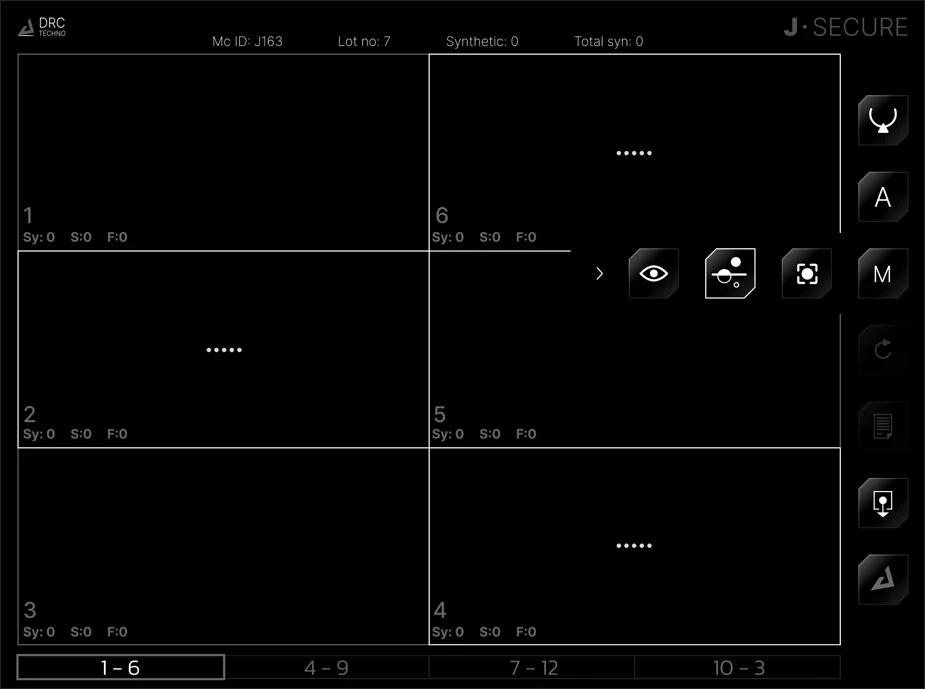
Manual scan
Select cells to scan, then select manual scan.
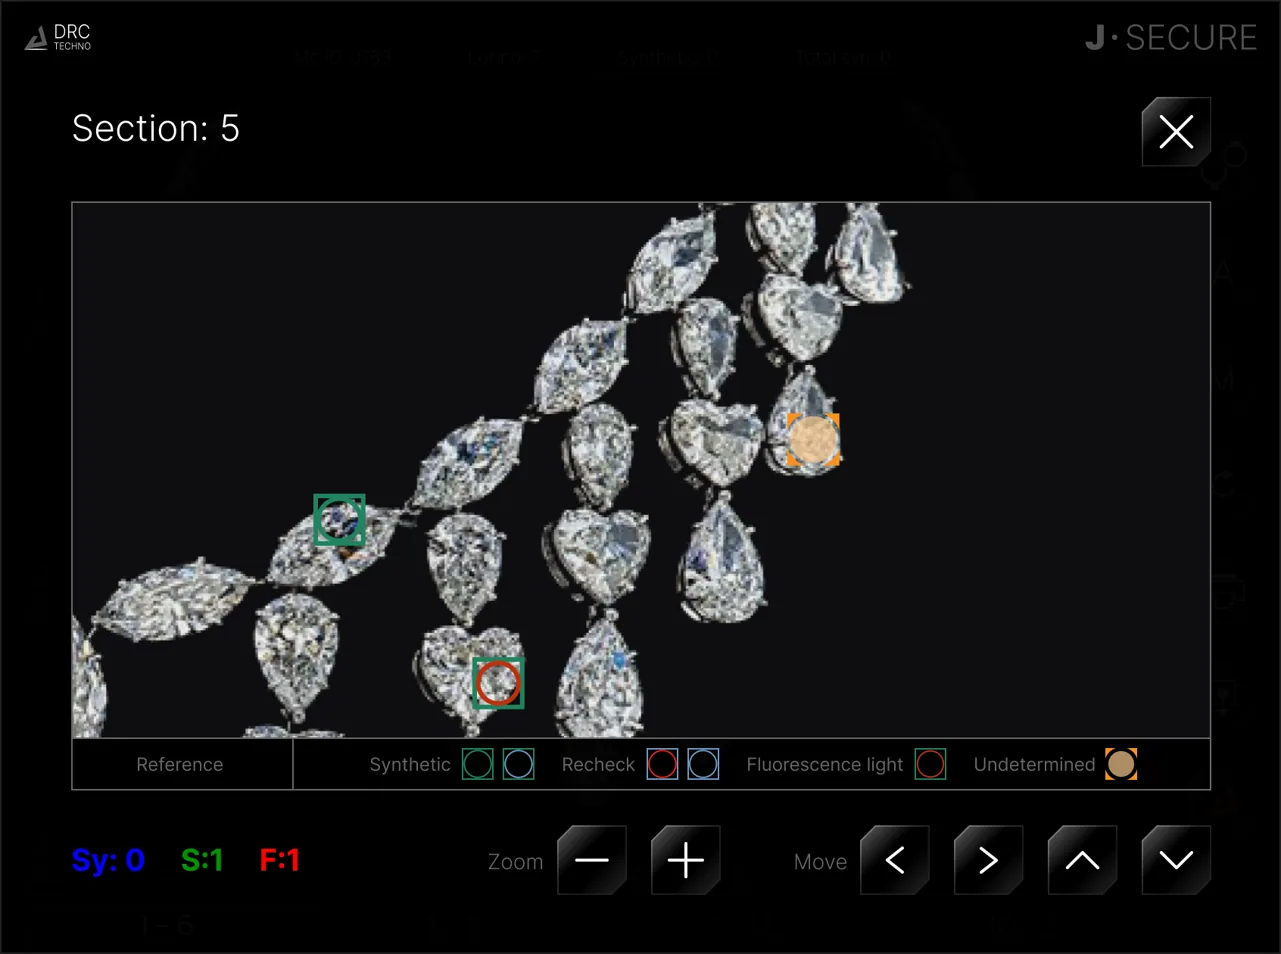
Post scan, inspect scan
After scanning, each cell can be expanded to examine it closer. Scanning symbols with labels are included for reference.
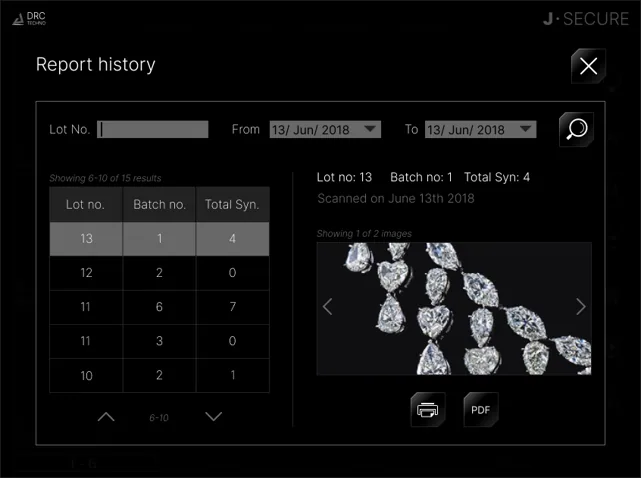
Post scan, report history
A tabular list of scans, which can be queried by lot number or date range.
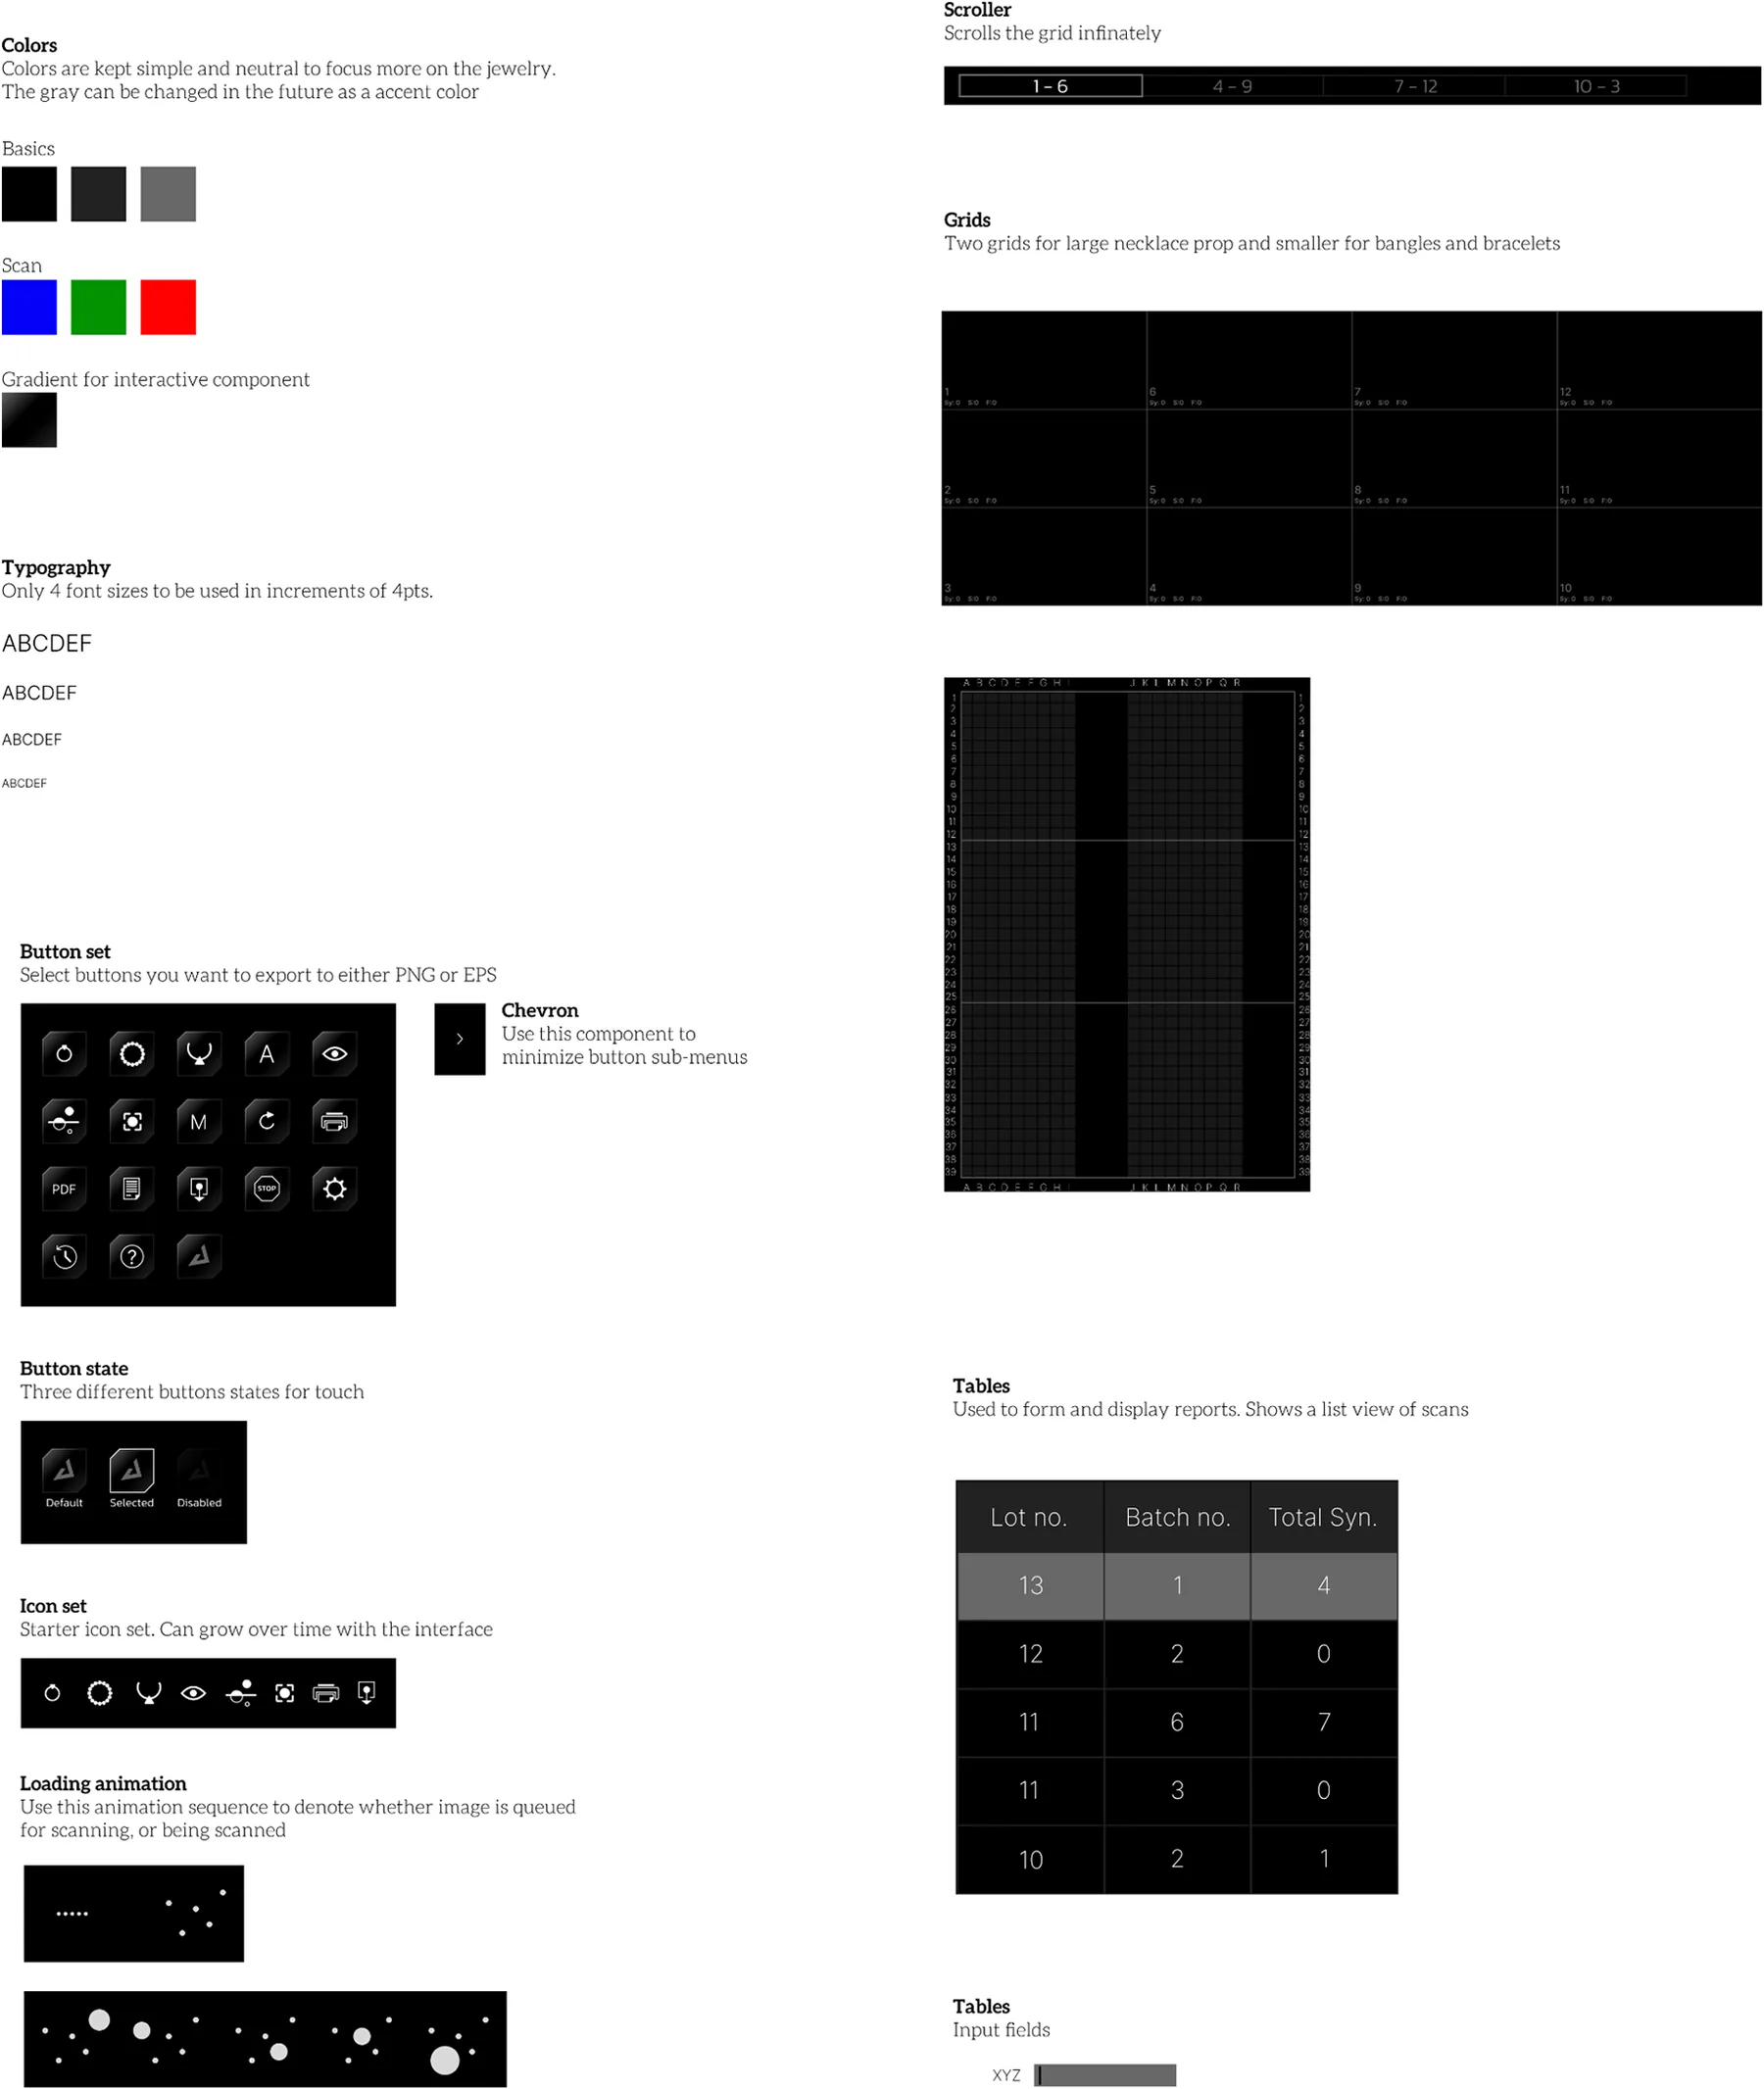
Design handoff
A handoff document with colors, UI components and interaction flows.